Using Intellij with ASTRA
This guide will provide an overview of how to create a basic ASTRA project using IntelliJ and Maven. If you have not used Maven before, it may be worth checking out the Youtube video below which gives a general introduction to using Maven with IntelliJ. If you are not sure what Maven is, I would recommend watching or reading an introductory tutorial such as the second link given below.
What you’ll do
In this guide we create an IntelliJ project that is based on the basic Helloworld ASTRA project covered in the Building ASTRA Projects With Maven guide. We assume that you have a basic understanding of how Maven works.
What you’ll need
- About 15 minutes
- An installation of IntelliJ (This guide is based on version 2019.1.3)
Creating an ASTRA Project
Start IntelliJ and select File->New->Project. You should see the Dialog window shown below.
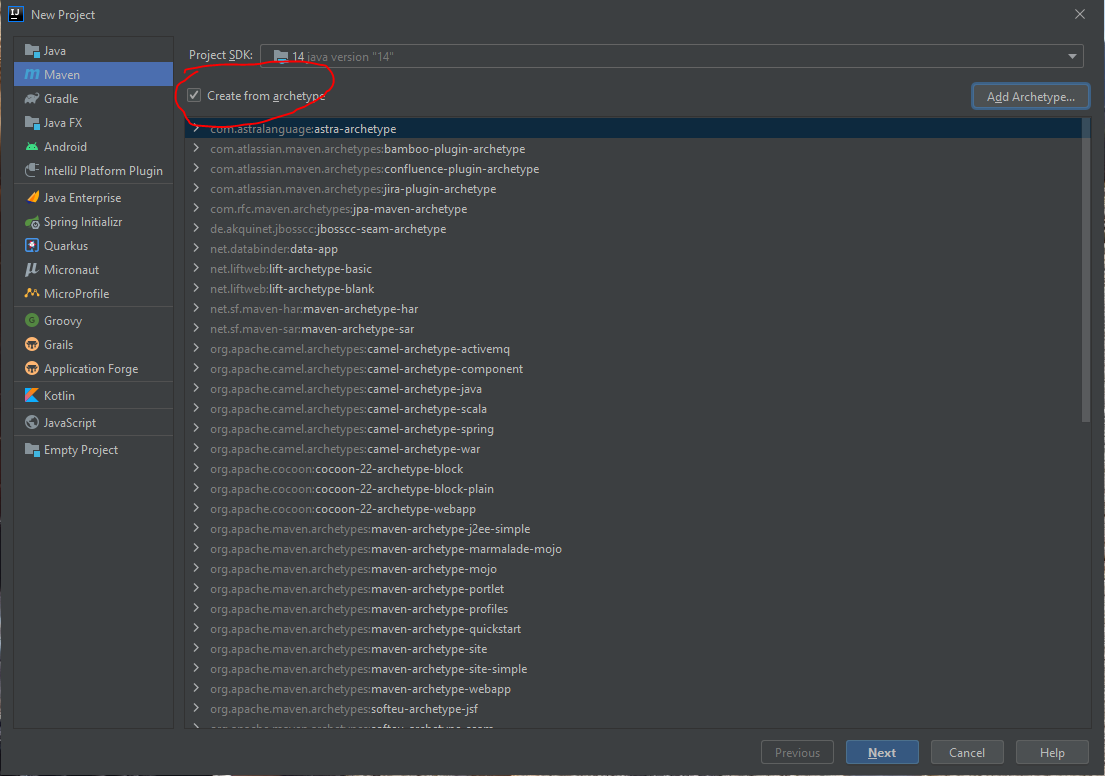
Select “Maven” from the list of project types on the left, and check “Create from archetype”.
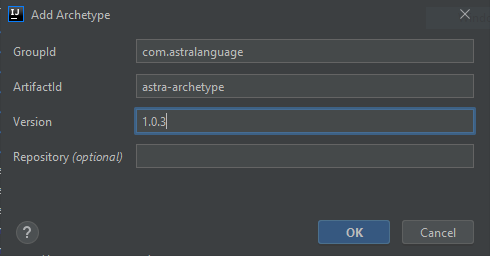
If it is your first time creating an astra project, you will have to add “com.astralanguage:astra-archtype” manually to the archetype list (it is highlighted by a red circle above). To do this, click on the “Add Archetype…” button to the right of the “Create from archetype” check box. This opens an “Add Archetype” Dialog. Enter the details as provided below and click “OK”.
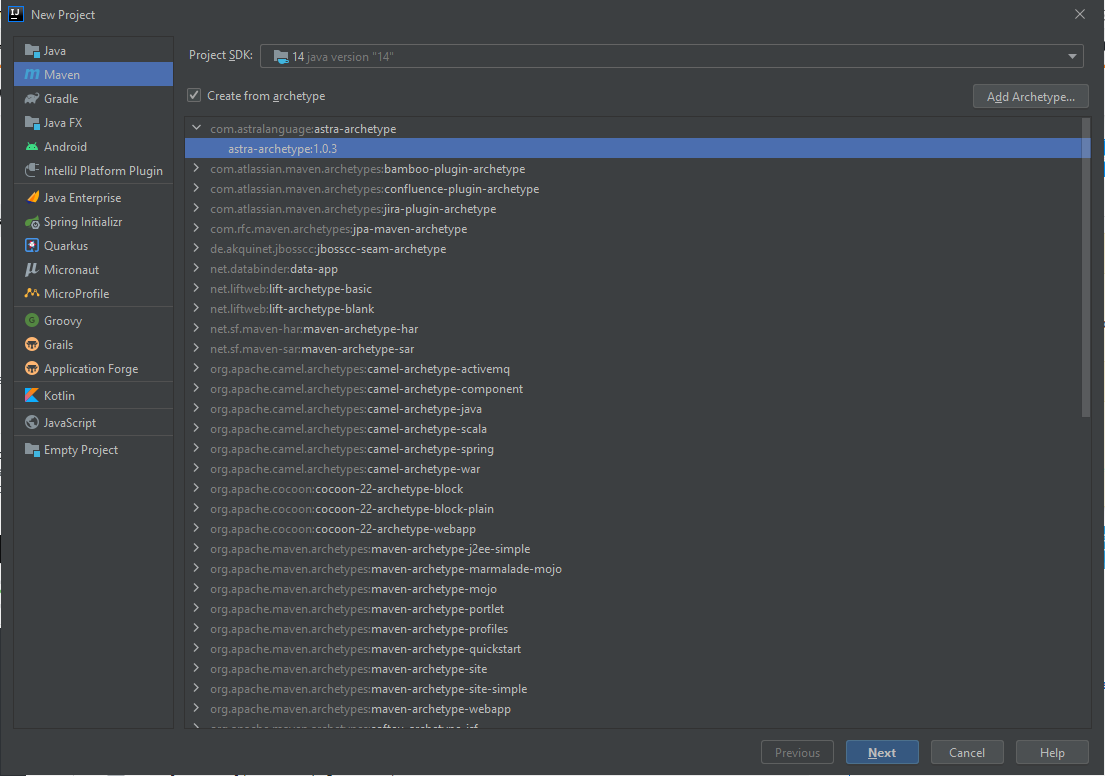
Your “New Project” Dialog should now include the ASTRA Archetype. Expand the “astra-archetype” node and select the archetype instance (as shown below). Click on “Next”.
This should bring you to a screen that allows you to define the maven project you want to create and where you want to create it. Give your project a groupId (normally a reverse domain name), an artefactId, and then click on “Next”.
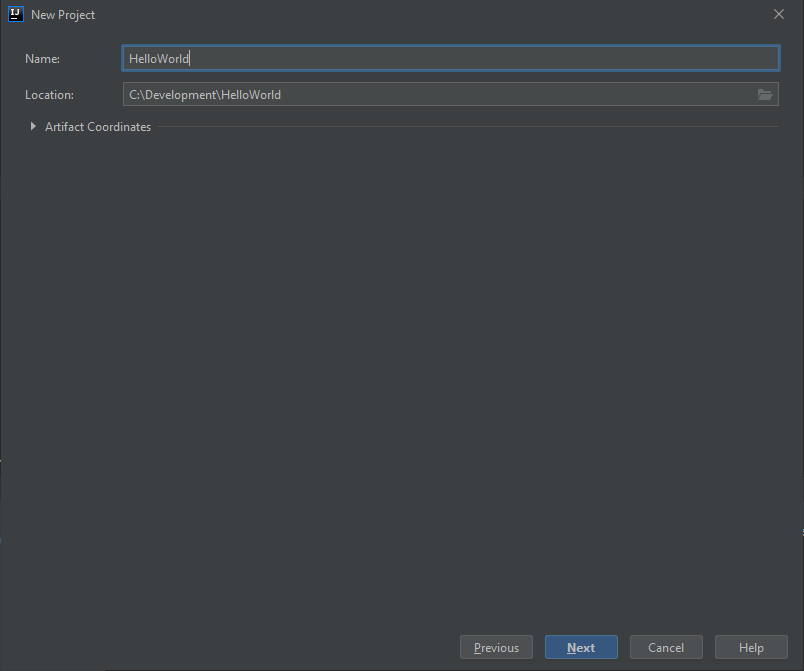
Enter your preferred details (I have kept the IntelliJ project name the same as the Maven project name here) and click “Finish”. Your project is now created!
Supplementary Notes
- Confirm the version for the
astra-baseparent pom and theastra-maven-pluginplugin correspond to the relevant version of ASTRA. - You may be asked if you want to create the project folder if the folder you specified does not exist.
- You may be given the option to “Enable Auto-Import”. This can be a good feature to turn on because IntelliJ will download and manage your project dependencies in the background. Not using this option means that all dependencies are downloaded the first time you run the project. This also allows you to run a maven project using the IntelliJ Run tools.
Quick Tour of the Project
With Maven projects, the most important file is the pom.xml file. This is the project management file and specified all required dependencies, build tools and configuration information required to build and deploy your project.
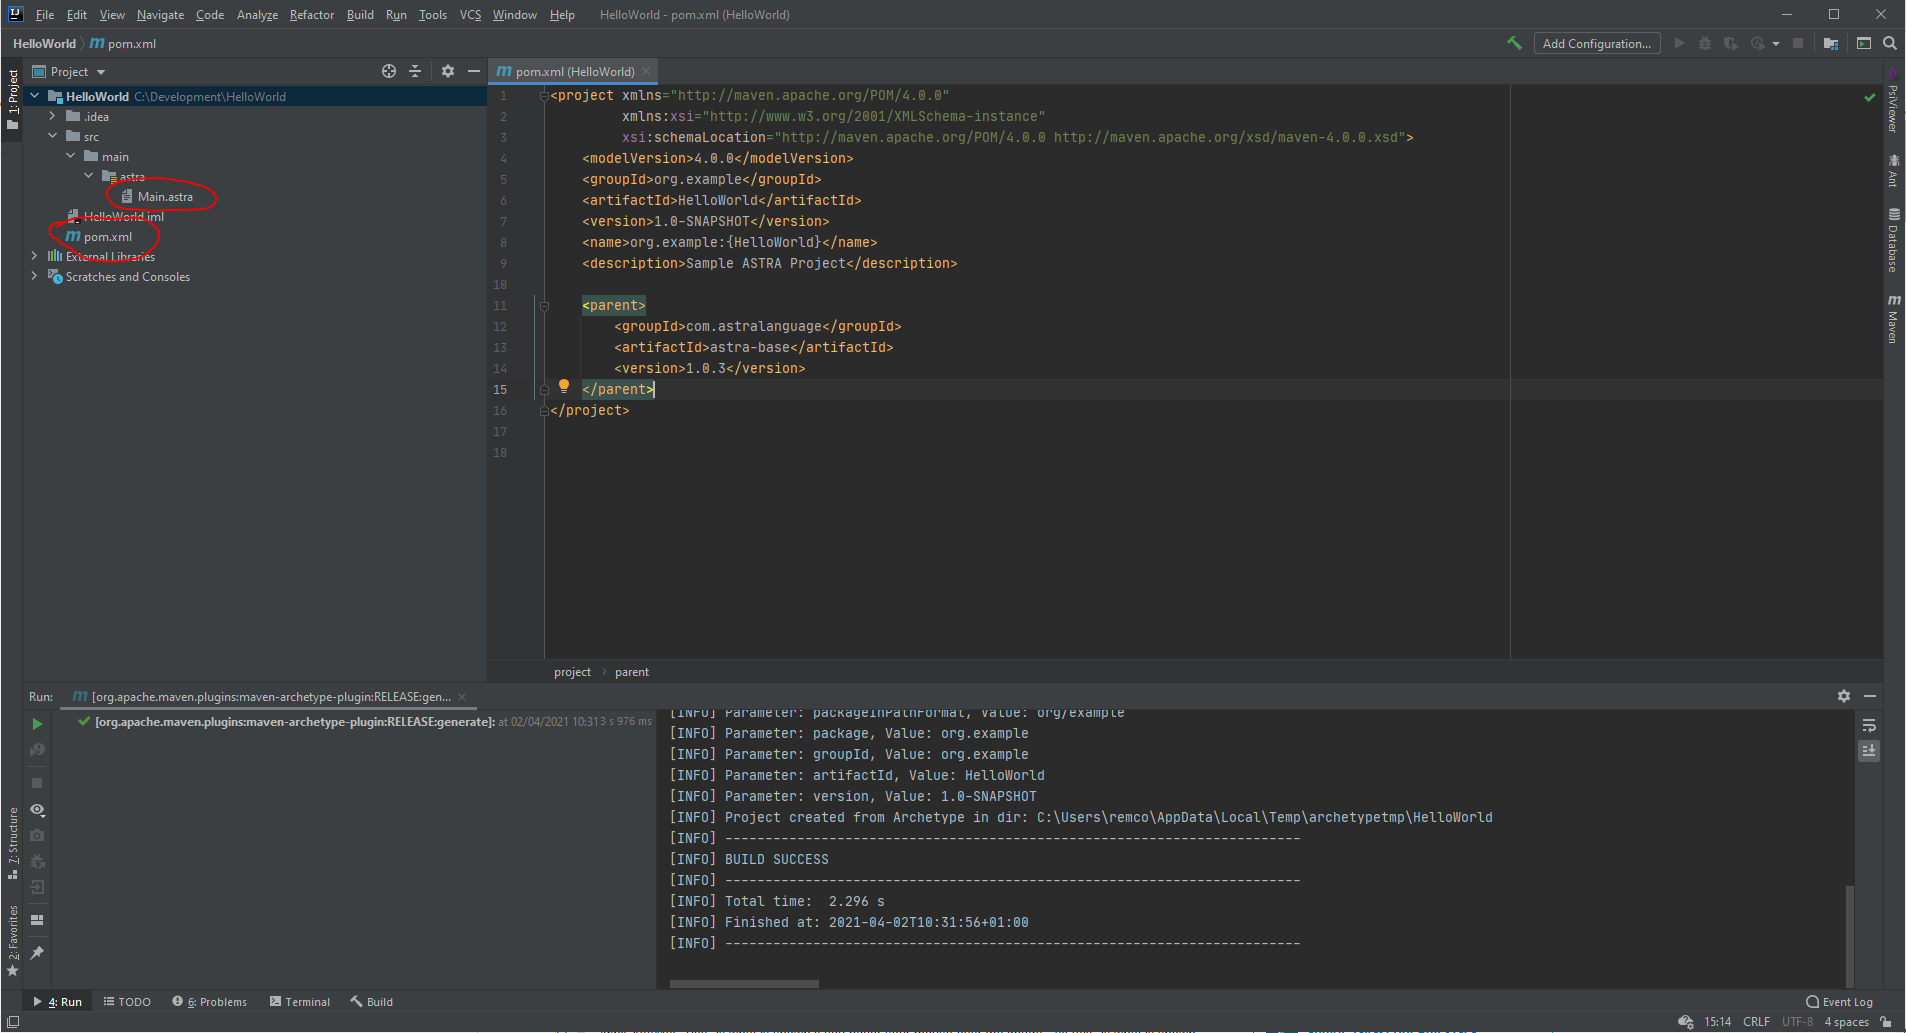
As can be seen on the screenshot above, the pom.xml file can be found on the left hand side in the project file structure (it is in the project root folder).
On the right hand side, you can see a special “Maven” tool window (the tab for the button is highlighted in red on the right of the screenshot). This window presents the various build targets and plugins for each maven project. Below we identify the targets required to compile and run ASTRA code.
To compile the project, you double click on the compile target:
HelloWorld->Lifecycle->compile
This target compiles both Java and ASTRA code.
To run an ASTRA program, you click on the deploy target:
HelloWorld->Lifecycle->deploy
Both of these targets make use of astra-maven-plugin, a custom plugin that has been created to simplify compiling and deploying ASTRA code. This plugin includes three custom targets:
astra:compilecompiles any ASTRA code to Java code and then compiles the Java code to byte code.astra:testruns any specified ASTRA unit tests.astra:deployexecutes a target agent program. By default, it looks for the fileMain.astra, located in thesrc/main/astrafolder. This can be overridden as required.
Running the Project
To run the ASTRA program, you simply click on the deploy target as described above. The result should be thate IntelliJ runs maven, creating an output window containing output similar to that provided below.

Summary
Congratulations! You created and deployed your first ASTRA program using IntelliJ. You should now be in a position to follow the other guides provided, using IntelliJ rather than the command line. I would suggest starting by reviewing the Building ASTRA Projects with Maven guide, completing the additional steps at the end using IntelliJ.